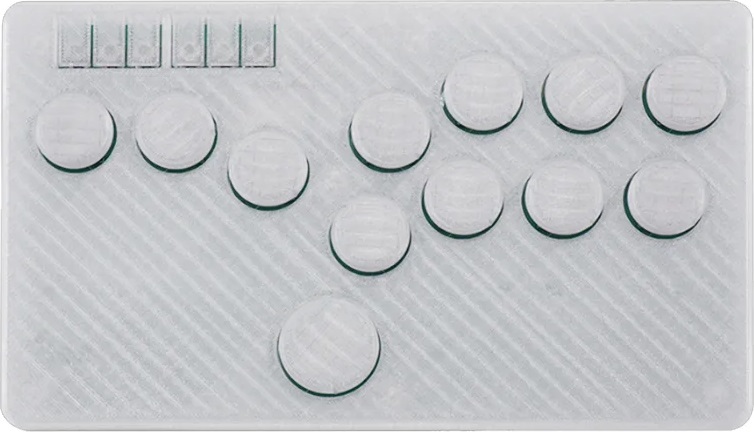
| Price | AliExpress |
| Release | August 15, 2021 |
| Compatibility | PS4 / PS3 / PC |
| Dimensions | 8.6″ x 5.1″ x 0.4″ |
Other Editions
Introduction
Unless you order it preassembled, the Flatbox by jfedor can be created by accessing the GitHub repository that has 3D printable models, PCB design files, and code. There are five major revisions of the Flatbox, with most if not all of them using Kailh Choc V1 low profile switches.
While the fourth revision has RP2040 as the firmware and onboard chip, it is the third revision that will give you the most compatibility, thanks to a Brook PCB, which is why we will cover the third revision in this writeup, although it should not be too different than the fourth revision. The cable connection is USB-C.
Performance
There are four main design elements that make the Flatbox shine. First of all, its size makes it easy to carry as well as play on a desk. You can set it on your lap to play as well, but you would likely have to close your legs to do that.
The second advantage of the Flatbox is the buttons. The main buttons can tolerate hot swappable switches, and the secondaries are designed in a way that makes it hard to press them by accident. If you would like to press the secondary buttons, that should still be easy.
Third, as the Flatbox’s name indicates, this innovation is quite slim, and fourth, the detachable cable of the Flatbox is quite convenient.
Hardware
In the third revision, the PCB only includes a USB port, and you are supposed to solder a Brook PS3/PS4 Fighting Board onto it. This is what you would need:
- Brook PS3/PS4 Fighting Board
- Flatbox PCB
- 3D printed top & bottom case parts
- 3D printed button caps
- 12 Kailh Choc V1 low profile switches
- 12 Kailh low profile hot swap sockets (optional)
- 7 wooden screws (3 mm x 10 mm)
- 6 tactile switches (6 mm x 6 mm x 5 mm)
- Soldering iron
- Any anti-slip implementation at the bottom
Print the case at a layer height of 0.2 mm. The top part should be printed upside down, while the bottom part should be printed as it is. No supports are required by them.
Use JLCPCB to make the PCB and assemble the SMD (surface mount devices) parts. The included files in the repository can be directly used with JLCPCB. In case you want to use another service, you should check the expected file formats.
If ordering from JLCPCB, upload the Gerber zip folder while leaving all settings at default. You can choose the PCB color. Then, select “SMT assembly” and upload the BOM & CPL files. Note that the PCB thickness should be 1.6 mm.
The Brook board has to be soldered directly on top of the PCB so that it fits inside the case. You do not want the plastic base of the pin header not to be able to go between the Brook board and PCB.
As for the switches, they can be soldered directly onto the PCB or, if you like, you can use hot swap sockets, the latter of which will require that you print the appropriate bottom case part that is a millimeter thicker.
Since the third revision uses a Brook PCB, it does not use the firmware of the repository creator, jfedor, nor does it use any open source firmware. For that reason, you should visit Brook’s website for firmware updates.
Appearance
The Flatbox is simple, minimalistic, and if you print it with the right material, the texture can be pleasing while providing grip if you decide to pick up the Flatbox with your fingers.
In addition, there are no restrictions when it comes to case and button colors. To add custom art, you would have to print the art on vinyl.
Conclusion
The Flatbox is a no-brainer if you would like to print your own mini 3D hitbox or simply order one preassembled.
- Slim
- Compact
- Light
- Hot swap sockets
- Option button design
- Detachable cable
- Color choices
Rating
⭐⭐⭐⭐⭐

